Its that time of year again! Halloween means pumpkin carving!
As an Amazon Associate I may earn commission on qualifying purchases
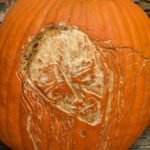
Well here we are again, it’s Fall. Where does the year go? If you’re like me you are busy and like to make things easier if possible. As in clean-up after carving pumpkins! I have a few tips to share that hopefully will help! Also tips below on how you can do a shaved pumpkin like King Viserys shown above.
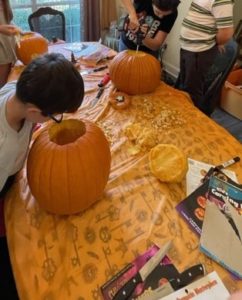
Grab one of those cheap tablecloths they sell at most stores. Dollar store, walmart etc. Then I let them just scoop out the guts and put them right on the table. Then when everything is done, grab all the sides and tie it and take it straight out to the trash can.
This next one is totally preference. I’ve done it both ways and honestly. I still prefer cutting the top off. Make sure you always cut at an angle so the top doesn’t fall in when you set it back on. But you can cut the hole in the bottom instead. Of course if you do this method and use a real candle make sure it is set on something appropriate. However, it does allow for quicker cleaning. Most of the guts are stuck along the bottom.
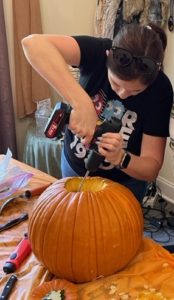
Speaking of cleaning! Why am I holding a drill? There is this handy tool they sell that makes cleaning the inside SO much faster. You just attach it to your drill. I will post a link to one. I have seen people use their kitchen mixer attachments. However this attachment is much more heavy duty.
We used to buy the cheap carving kits. But I’m sure this isn’t your first rodeo either. Those cheap sets bend and are flat out hard to use! Amazon does have a lot of stainless steel sets for under $20. Then you can use them year after year.
After you’ve drawn your design on paper or maybe freehand on the pumpkin. Use a toothpick or pencil to poke holes along your lines. Start cutting with your little saw or serrated knife. You can always cut well inside your lines and work your way closer to the lines if you’re afraid of messing up. Because once its cut, there’s no going back. Use an X-acto knife for fine details.
This video are my kids and husbands pumpkins. The flickering battery lights I highly recommend. They come in basic one color and color changing. I found these at Walmart. Amazon has a 4 pack with a remote. Which honestly is better than reaching in the pumpkin to turn these on and off.
Any Game of Thrones and House of the Dragon fans in the house? I did this pumpkin last year and had NO idea what I was doing. But I knew my husband had a Dremel kit so I put my artistic abilities to the test!
Lets be honest King Viserys kind of looks like a zombie later in the show anyhow . When it started to get moldy it just added to the non lit effect!
Reference I used
Get your Dremel tools together. I used the thinnest attachment. Was almost like the end of a pencil.
Draw out your design or freehand. Hold pumpkin in your lap. It’s so much easier to look down.
Find a light to put inside the pumpkin as you carve. This will allow you to see how deep to shave.
The deeper you shave the more light shines through.
Reverse for the dark areas. The darker areas on this pumpkin, I didn’t shave away at all.